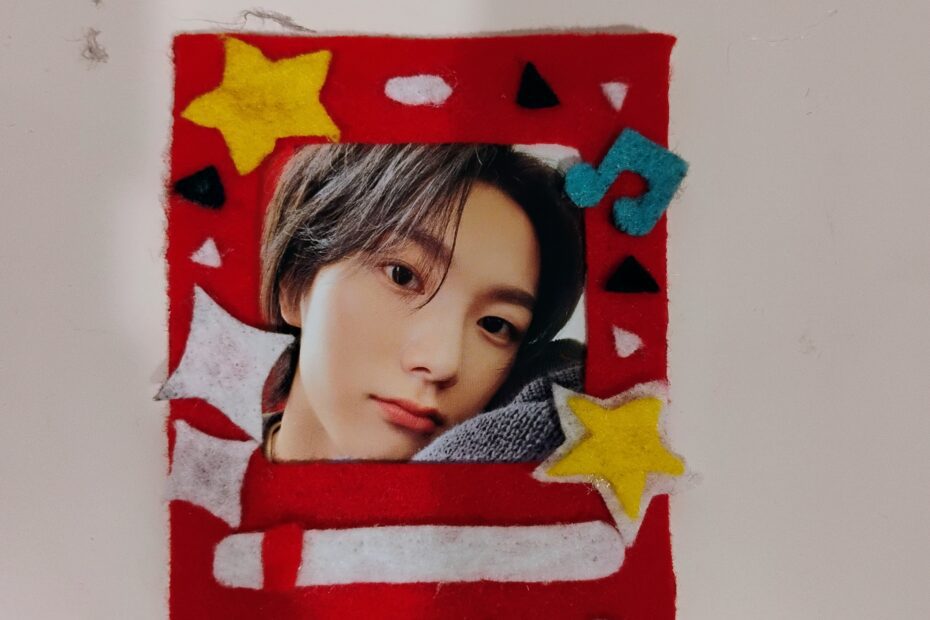
Looking for a fun and personal way to create unique Kpop photocard holders? Why not make your own felt photocard holders? This simple DIY project allows you to craft one-of-a-kind designs that you can customize and give as gifts, especially for Christmas. Whether you want to make felt photocard holders for your friends or add a special touch to your Kpop collection, felt photocard holders are a fantastic and crafty way to show your love for your favorite idols.
Materials You’ll Need:
- Felt fabric (in various colors)
- Scissors
- Hot glue gun and glue sticks
- Embroidery thread (optional)
- Decorative buttons, stickers, or other embellishments (optional)
- A photocard
Step-by-Step Guide to Making Felt Photocards:
- Measure and Cut the Felt: Begin by measuring the size of your photocard. The typical size of a K-pop photocard is 2.5 x 3.5 inches. Once you have your measurements, cut a piece of felt that’s slightly larger than the size of your photocard. This will be the base of your felt photocard, so make sure there’s about 1/4 inch of extra felt on each side.
- Cut Out the Same Shape Again: Now, cut out another shape the same size as the first one. This piece will go on the back of your felt photocard to give it a neat and finished look. These two pieces will serve as the front and back of your photocard
- Design Your Photocard: The fun part starts now—deciding on your design! You can keep it simple or go all out with embroidery, appliqué, or embellishments. For a minimalist look, try using contrasting colors of felt for a clean border or fun geometric patterns. If you’re feeling creative, consider stitching or gluing cute designs, like stars, hearts, or your favorite idol’s name.
- Create a Space for the Photocard: To make sure the photocard is visible through your felt, pick one of the pieces and cut a hole in the center, leaving a border around the edges. This hole will allow your printed photocard to show through, giving it the appearance of being framed in felt. Make sure the hole is slightly smaller than your photocard to ensure a snug fit.
- Glue the Pieces Together: Once you’ve cut the hole, place the photocard inside the hole to make sure it fits. After taking the photocard out, use a hot glue gun to carefully glue the two pieces of felt together, aligning the edges so they’re even. Remember to leave the top open! It works best to do this one side at a time. Apply a thin layer of glue to avoid any excess spilling out.
- Add Felt Embellishments or Embroidery: Now it’s time to decorate! You can cut out smaller pieces of felt to create additional designs, such as hearts, stars, or words. You can also add some cute embroidery with thread to personalize your design further. Use embroidery floss to stitch little designs, such as a border around the hole, your favorite idol’s name, or a small holiday-themed design to give it a festive touch.
- Make It Personal: One of the best parts of creating felt photocards is that they’re completely customizable. You can make multiple designs to fit different themes. For example, create a set with Christmas designs like snowflakes, trees, or presents, and give them to your friends as a thoughtful gift! If you’re gifting to fellow K-pop fans, consider adding little details that match their favorite group’s style or colors.
Now You’re Done!
You’ve now created your very own felt photocards! These make perfect Christmas gifts for your Kpop friends. With your personal touch and creativity, they’ll appreciate the effort you put into crafting something unique just for them. Whether you’re swapping designs or giving them as a thoughtful gift, your friends are sure to love these custom felt photo cards this holiday season!
So grab your materials, get crafty, and create your very own felt photocards!
More Examples:
Check out our Pinterest board for more ideas!
